
A splash page is an intermediate page: when someone clicks on your short link, they see your logo, a title, a phrase, and perhaps a second button for a few seconds before being redirected to the destination. This is useful when the link leads to a site that isn’t yours—for example, an external form or an online store—and you want to give credit to the person who shared it.
Create a splash page
- In the dashboard menu, open ” Splash Pages ” and create a new one.
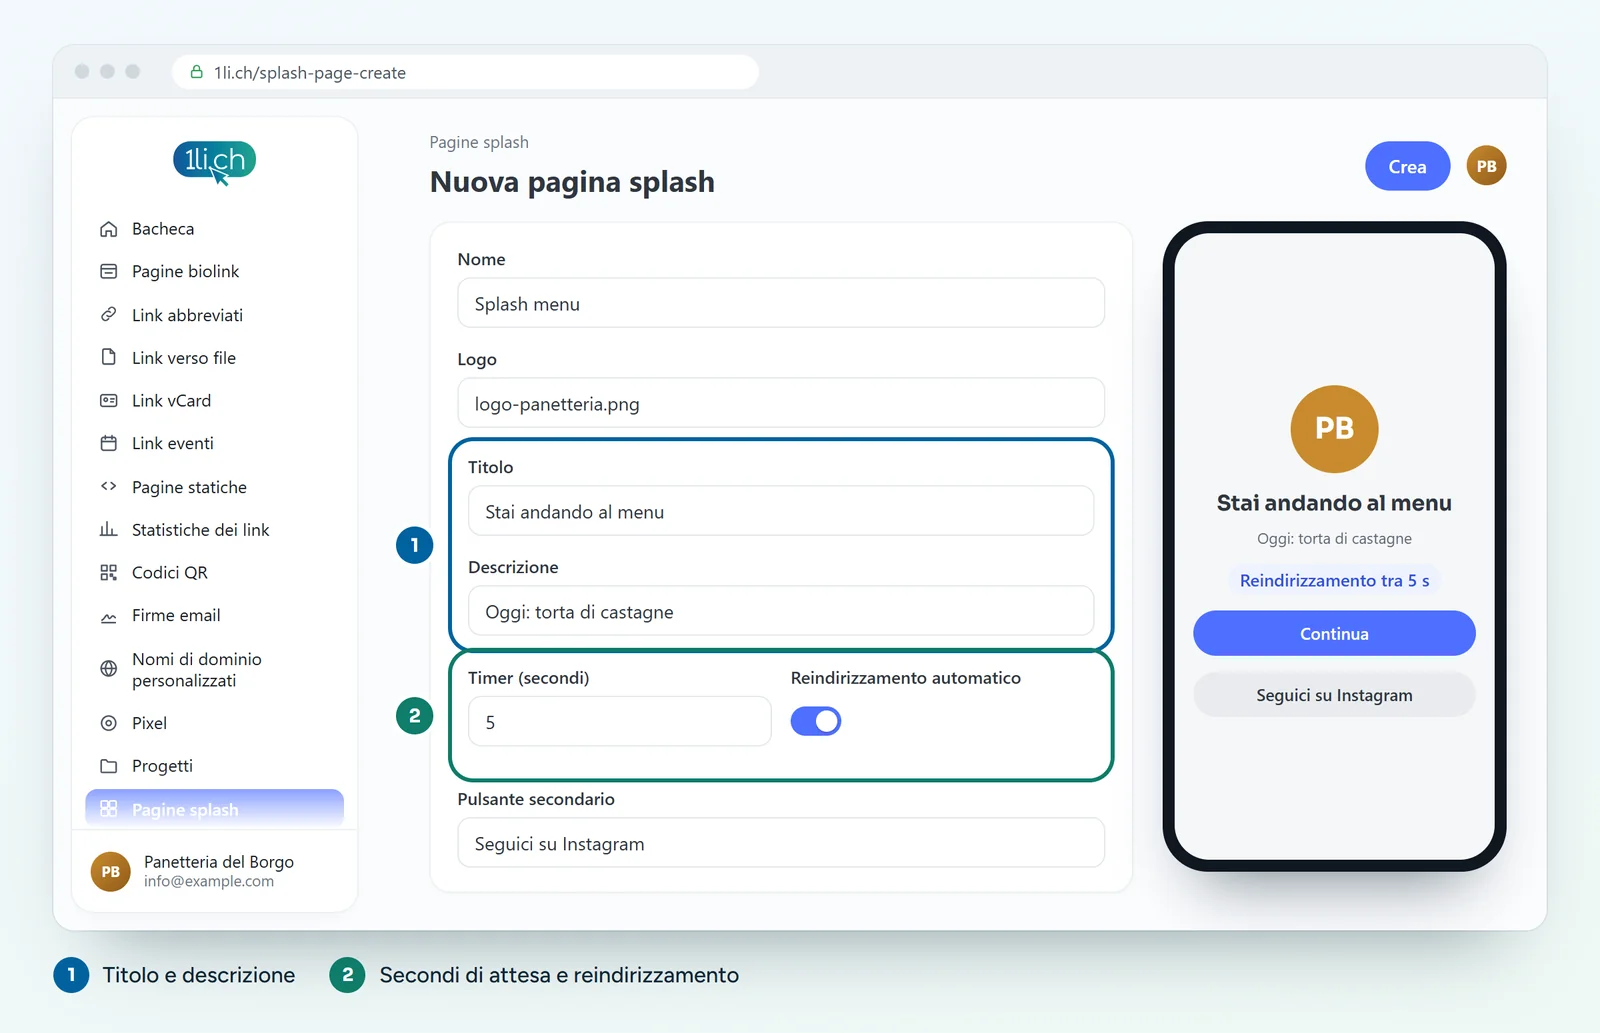
- Give it a name you’ll recognize, such as “Splash Menu.”
- Upload the logo and write a title and description: keep them short—they should be readable in just a few seconds.
- If you want, add a secondary button, such as “Follow us on Instagram.”
- Set the timer in seconds and enable automatic redirection.
- Save.
Link it to a URL
- Open the Links list and go to edit the short link.
- In the splash page field, select the one you created.
- Save and test the link on your phone.
You can use the same splash page for several links. Biolink pages also have the splash page option in their settings.
When to use it, and when not
- Yes: links to external forms, an online shop or a PDF, to remind people of your brand and suggest a next step.
- Yes: a short notice, for example «Registration closes on Friday».
- No: on menu or Wi-Fi QR codes, where people want to get there straight away. Every second of waiting loses someone.
Tips
- Keep the timer short: 3-5 seconds are enough.
- Always keep the button to continue straight away visible.
- Check the link statistics before and after: if clicks drop, shorten the timer or remove the splash page.
In your plan
| Feature | Free | Personal | Business | Agency |
|---|---|---|---|---|
| Splash pages | no | 5 | 50 | 250 |
See plans and pricing.