
An offer valid only for the weekend, registrations that close at midnight, a competition for the first 100 entrants: with scheduling, the link does on its own what you would otherwise have to remember to do by hand. You set when the link goes live, when it stops working and how many clicks it accepts, then you choose where to send anyone who arrives too late.
- Open the Links list and go to edit the link you want to schedule (or create a new link with Create).
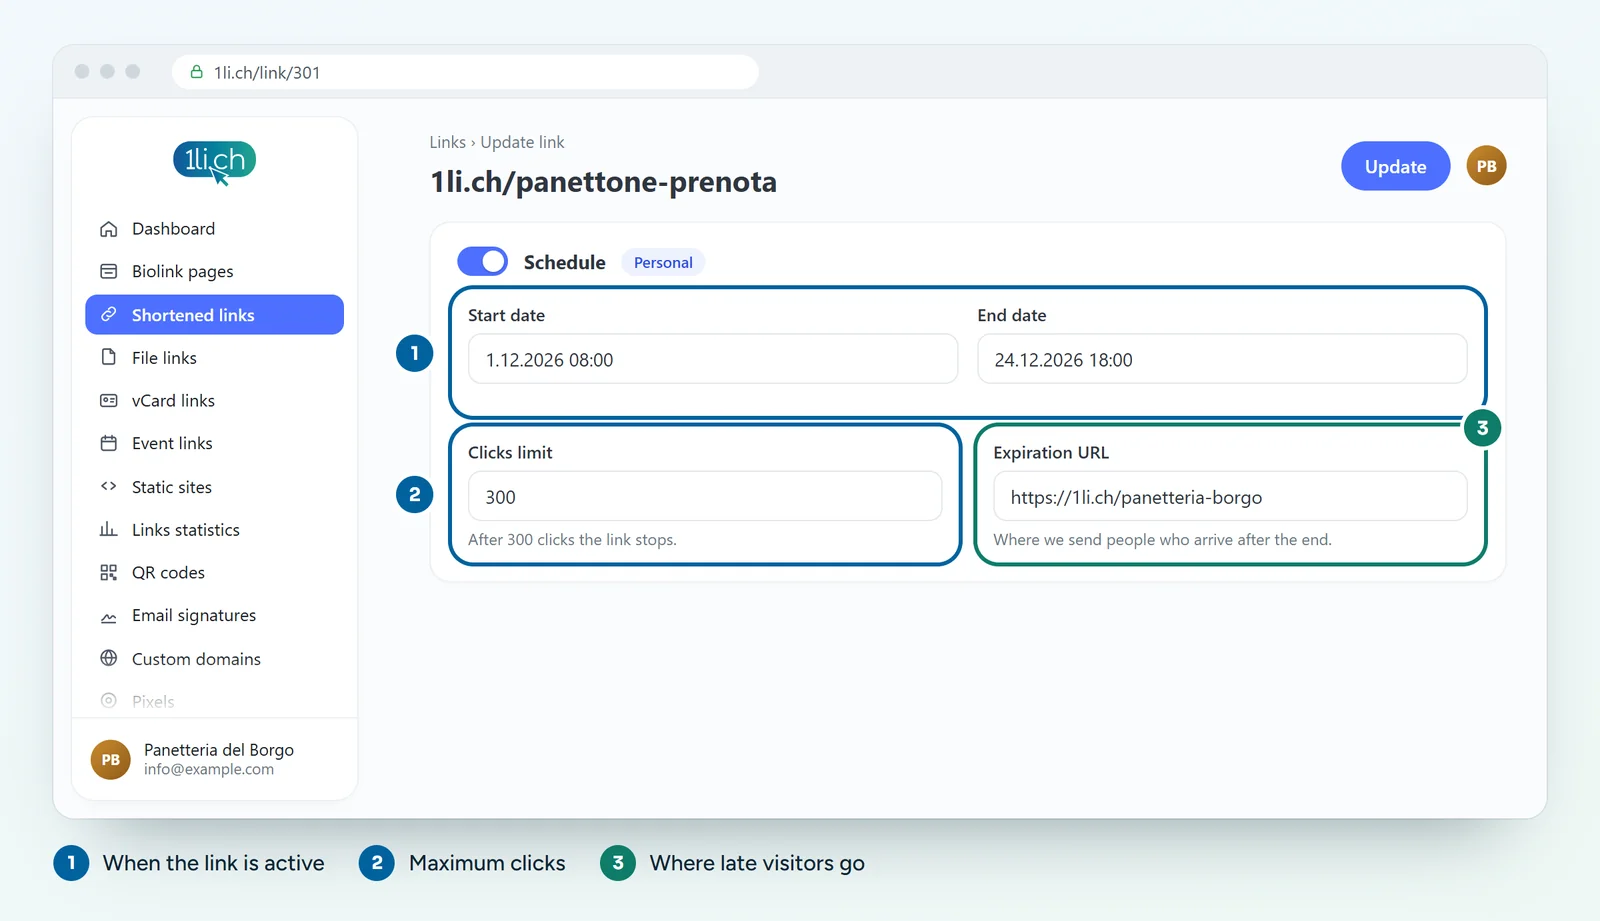
- Open the Scheduling section and switch it on.
- Set the start date: before this moment the link does not lead to the destination.
- Set the end date: after this moment the link has expired.
- If you like, fill in Click limit with the maximum number of clicks the link should accept.
- In the Expiration URL field, enter the address to send visitors to when the link is no longer active.
- Save your changes.
Practical examples
- Time-limited promotion: end date on Sunday evening, expiration URL pointing to the page with your current offers.
- Limited places: a limit of 50 clicks on the link to the registration form, expiration URL pointing to a page saying “Registrations closed, write to us to join the waiting list”.
- Scheduled announcement: you prepare the link today, print it on your flyers and set the start date to launch day.
Tips and common mistakes
- Always fill in the expiration URL. People who arrive after the deadline are still interested: send them to a useful page, not a dead end.
- Check the time zone of the dates before saving, especially for deadlines at midnight.
- The click limit counts clicks, not people: someone who opens the link twice counts twice.
- Want to reopen an expired link? Just move the end date or raise the limit when you edit the link.
In your plan
| Feature | Free | Personal | Business | Agency |
|---|---|---|---|---|
| Scheduling, click limit, expiration URL | no | yes | yes | yes |
On the Free plan the link always stays active. See plans and pricing.